Compare tattoo placements by pain, visibility, fade risk, and size so you can choose a body area that fits the design and your day-to-day life.
How To Choose A Tattoo Placement
Choosing where to put your tattoo is just as critical as the design itself. A masterpiece placed poorly can warp as you move, fade prematurely due to friction, or fail to complement the natural architectural lines of your physical body. When evaluating placements, you must balance four crucial dynamics: pain tolerance, daily visibility, longevity, and canvas size.
In this guide, we break down what you need to consider before the stencil even hits your skin so you can make an informed, timeless choice. If you want the wider decision-first hub, start with our Tattoo Guides archive. Make sure to visit our extensive Tattoo Styles Explained guide if you are unsure which aesthetic matches your placement.
Placement Tradeoffs: Pain, Visibility, Fade, and Space
Evaluating tradeoffs makes the placement decision significantly easier. Consider the table below:
| Body Part | Pain Level | Fade Risk | Visibility | Ideal Scale |
|---|---|---|---|---|
| Forearm | Low to Medium | Low | High | Badges, panels, script |
| Upper Back | Medium (Spine is High) | Low | Low to Medium | Symmetrical geometry, wings |
| Chest / Sternum | Very High | Low | Low | Full shields, natural flow |
| Hands / Fingers | High | Very High | Very High | Bold symbols, minimal dots |
| Ribs | Extreme | Low | Low | Intimate pieces, delicate lines |
If you want a highly visible piece but cannot endure heavy pain, the forearm is arguably the greatest canvas on the human body. Conversely, if you want something immensely private and don't mind suffering through the session, the ribs offer a gorgeous, curving canvas.
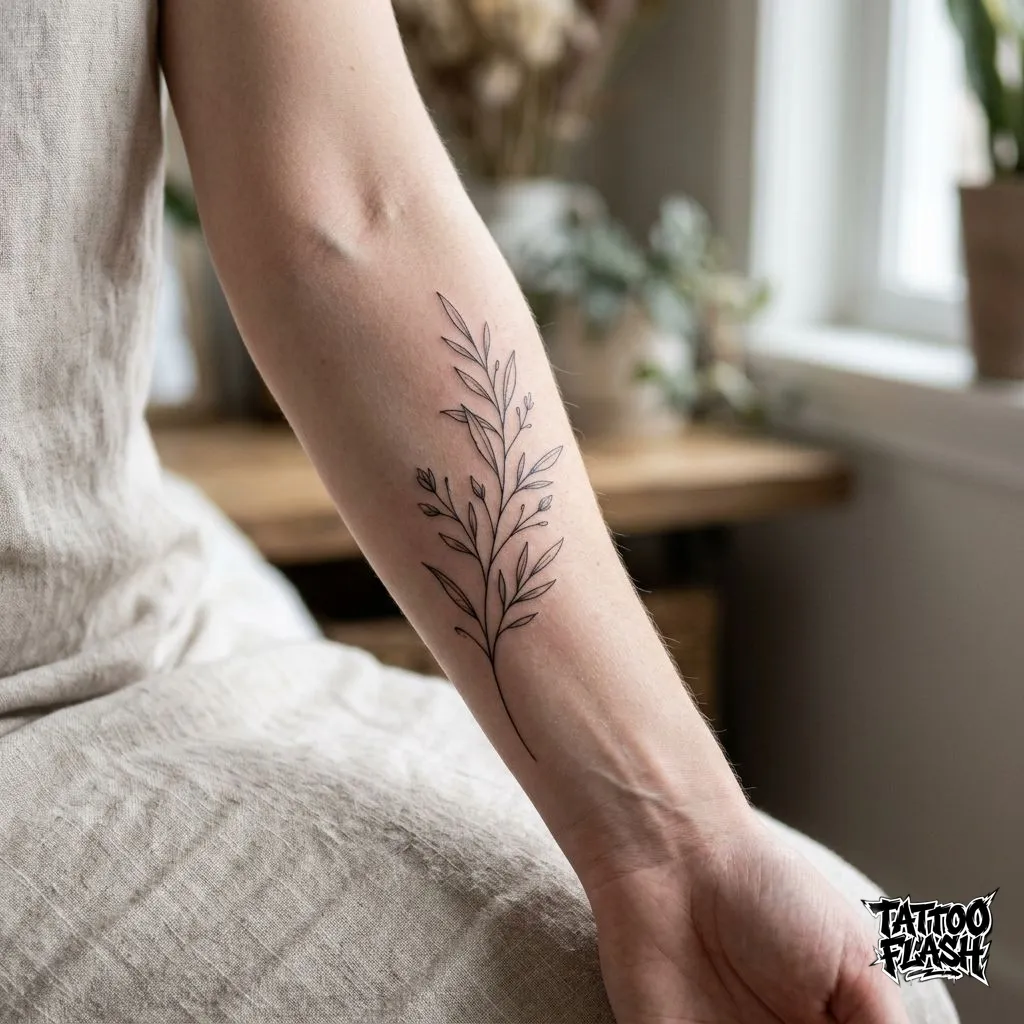 The inner forearm provides a relatively low-pain, low-fade canvas that perfectly supports delicate pieces like this minimalist botanical stem.
Best Placements For Large-Scale Compositions
Massive ideas require massive canvases. If you are envisioning a sprawling geometric marvel or a full illustrative scene, you need to dedicate an area like the back, chest, or full thigh.
Cramming a hyper-detailed piece into a small footprint on your wrist or ankle will inevitably result in the ink bleeding together over the decades. The upper back, specifically, offers unparalleled symmetry and space. Because the back acts as a relatively flat billboard with broad shoulder structures, it perfectly accommodates massive centerpieces.
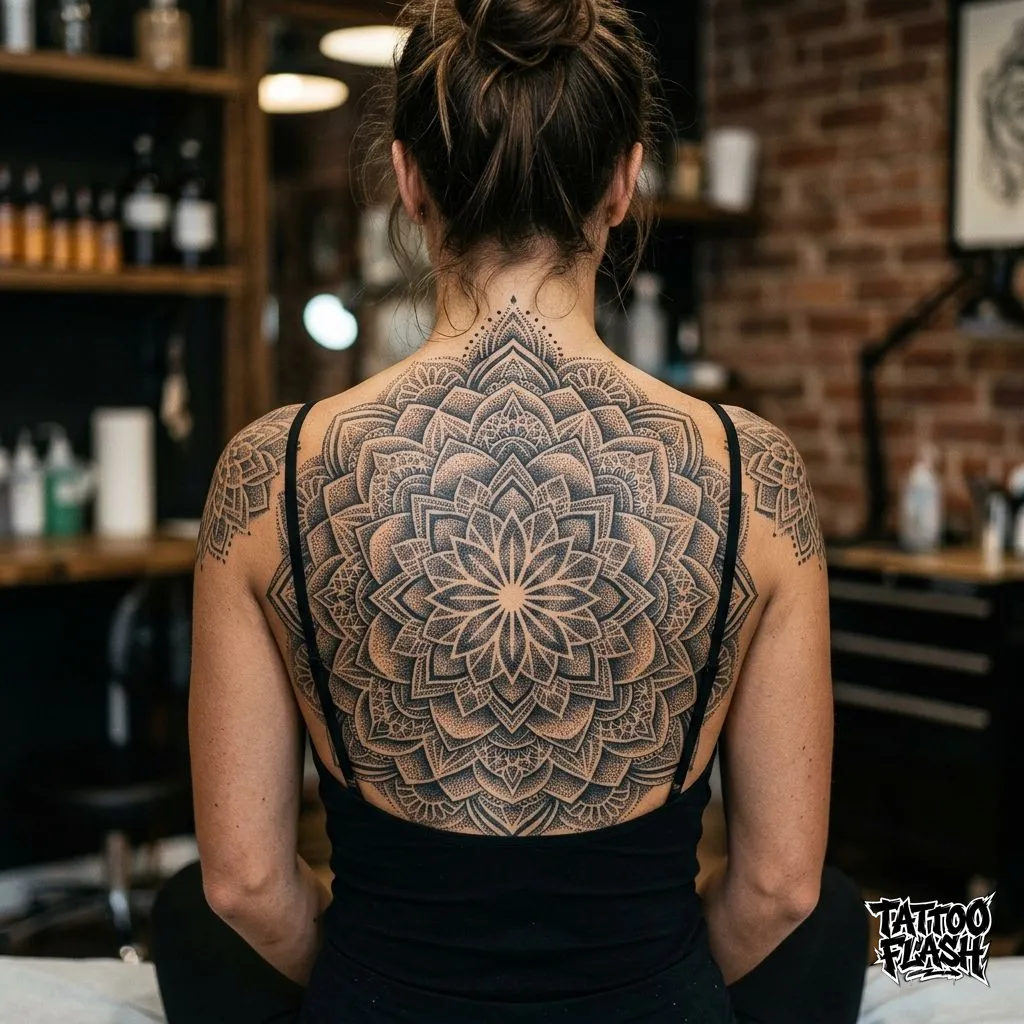 A massive geometric mandala utilizing the entire upper back, anchoring its perfect symmetry directly down the spine.
Similarly, the chest offers a powerful framing mechanism, using the collarbones and sternum to cradle the design.
 This illustrative owl utilizes the width of the chest plate, allowing the wingspread to flow naturally across the pectoral muscles.
High Fade Risk Areas: Hands, Feet, and Joints
Not all skin is created equal. The skin on your hands, fingers, and feet sheds and regenerates incredibly fast due to constant friction and washing. Furthermore, the cellular structure of this skin struggles to hold pigment as deeply as a thigh or bicep.
If you commit to a hand or finger placement, you must accept that it will fade, blur, and require frequent touch-ups. Highly visible placements like the neck create a different tradeoff altogether, which is why we recommend comparing this page with our dedicated Do Neck Tattoos Hurt? guide before you commit to a high-attention area. To mitigate this, artists typically recommend highly saturated styles like traditional or blackwork for the hands, as the heavy black pigment has a better survival rate.
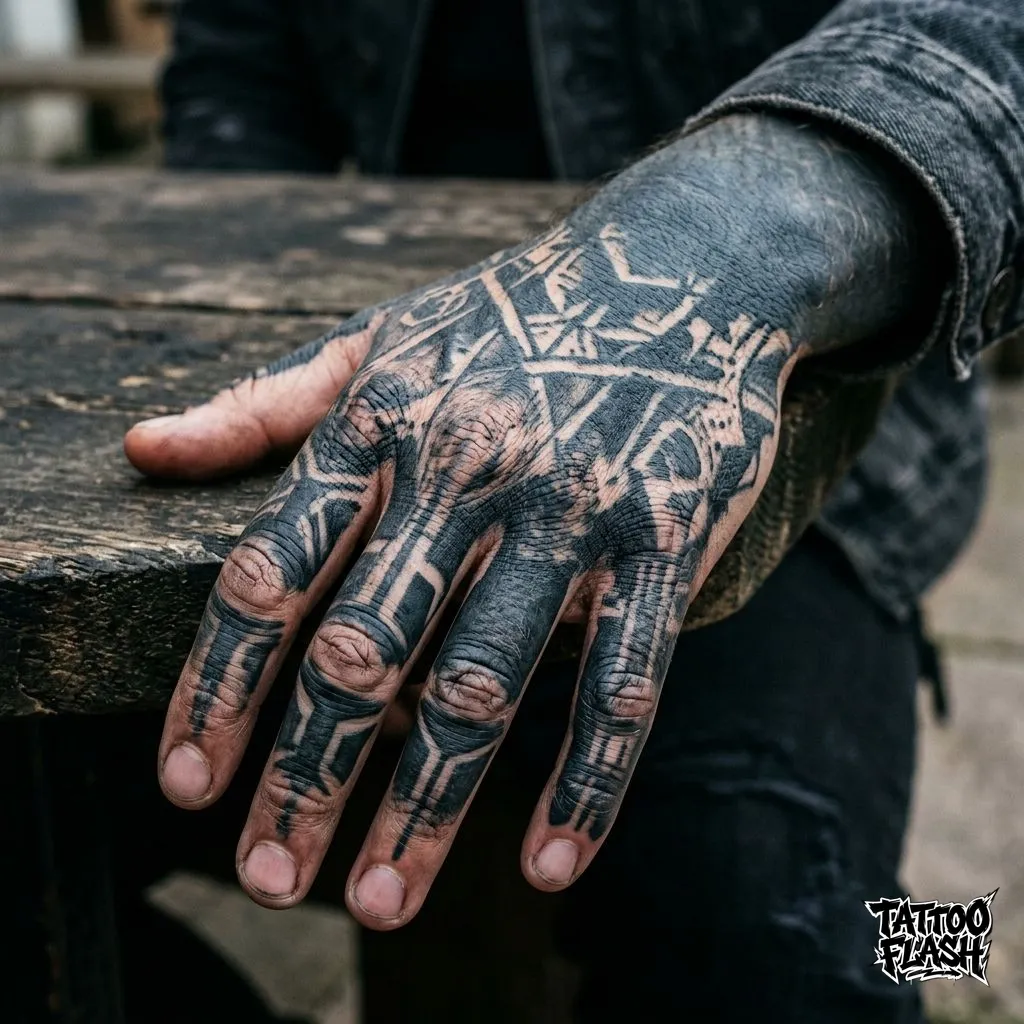 Heavy abstract blackwork on the hand. Bold, thick lines are required here to ensure the tattoo doesn't fade into oblivion within five years.
Common Placement Mistakes to Avoid
- Ignoring Anatomical Flow: Your body is not a flat piece of paper. A tattoo should curve with your musculature. For example, a perfectly circular design might look oval when placed on the curvature of a calf or bicep.
- Underestimating the Middle: A tiny one-inch tattoo placed dead-center on an empty, massive back canvas often looks like a floating speck. Reserve large canvases for large work, or place small tattoos near edges (like the wrist or ankle) to anchor them.
- Not Testing Stencils: Always ask your artist to let you see the stencil in the mirror while resting, flexing, and twisting. If you plan to get a tattoo on your ribs, ensure it looks correctly proportioned both when you inhale and exhale.
Before you book, try experimenting with our AI Tattoo Generator to visualize how different layouts and subjects map to specific body parts.
General Tattoo Aftercare
Regardless of the style or placement you choose, aftercare is the single most critical factor in how your tattoo will heal and age. A tattoo is an open wound, and treating it with respect ensures that the ink stays vibrant for decades.
First, always listen to your specific artist. They know how their ink sets into the skin and what their preferred healing method is, whether that is "dry healing" or using a specific medical-grade adhesive barrier like Saniderm.
For the first few weeks, you must keep the tattoo completely out of direct sunlight and avoid submerging it in water. Showers are fine, but baths, pools, and the ocean are strictly off-limits until the skin has completely flaked and sealed.
Keep the area hydrated with an unscented lotion or specialize tattoo balm. Do not over-moisturize, as this can smother the wound and cause breakouts, which lead to ink dropout. A good rule of thumb is to apply a tiny amount and rub it in completely. If the tattoo is shiny or greasy, you have applied too much.
Don't want a generic design?
Generate your own direction, keep the symbolism, and hand your artist a cleaner starting point.
Reviewed By

Content Expert
TattooFlash Editor contributes research-backed tattoo references and editorial updates for TattoFlash.